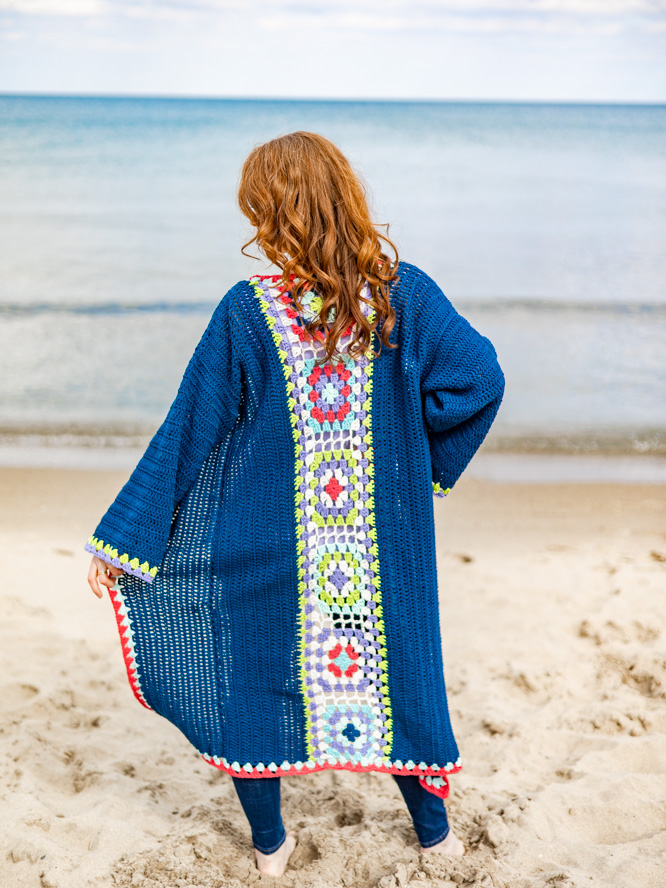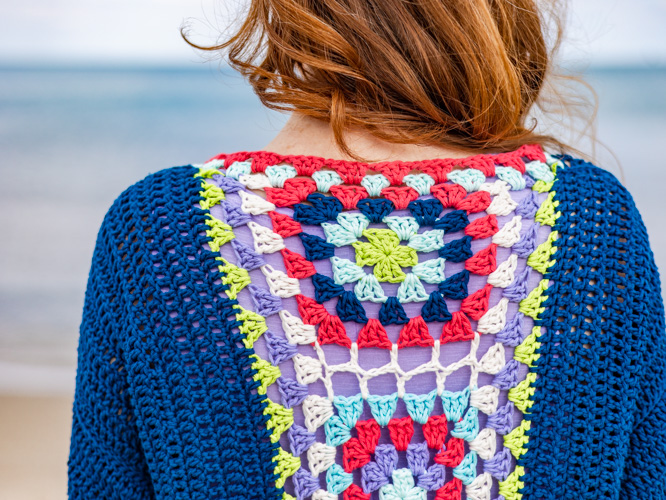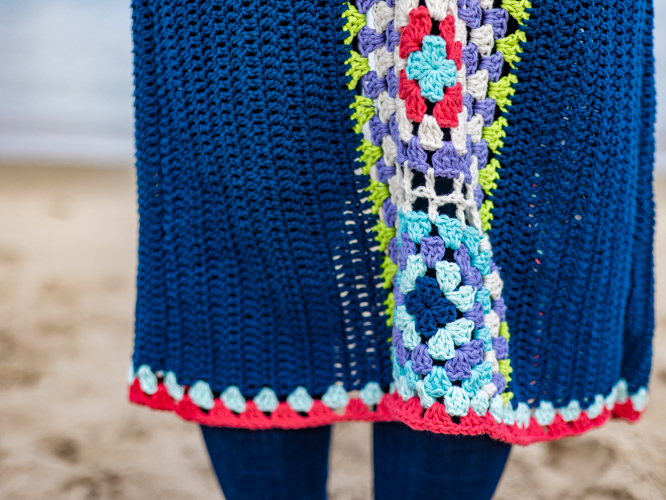
A panel of granny squares and classic granny stitch edging make this duster an instant closet staple. Bright and bold, this crochet cardigan features eye-catching grannies. Pair it with jeans and sandals for warm-weather adventures.
Time: 2 week project
Skill Level: Advanced
Size: Finished Bust Size 36.5 (38.5, 42.5, 48.5, 52.5, 56.5, 62.5, 66.5, 70.5)” to fit bust 30 (32, 36, 40, 44, 48, 52, 56, 60)”
Shown in size 36”
Gauge: 12.5 sts and 8 rows = 4” [10 cm] in Double Crochet, gently blocked.
Rounds 1-4 of Granny Square = 12cm wide and 13cm tall, gently blocked.
Materials
 Yarn: Paintbox Yarns Cotton Aran (100% Cotton; 93 yards [85 meters]/50 grams):
MC: Rich Teal (664) 14 (14, 15, 17, 18, 20, 21, 22, 23) balls
CC1: Pale Lilac (646) 1 (1, 1, 1, 2, 2, 2, 2, 2) balls
CC2: Lime Green (629) 1 (1, 1, 1, 2, 2, 2, 2, 2) balls
CC3: Macaron Green (670) 1 (1, 1, 1, 2, 2, 2, 2, 2) balls
CC4: Washed Teal (633) 1 (1, 1, 1, 2, 2, 2, 2, 2) balls
CC5: Lipstick Pink (652) 1 (1, 1, 1, 2, 2, 2, 2, 2) balls
CC6: Light Champagne (603) 1 (1, 1, 1, 2, 2, 2, 2, 2) balls
Hook: US size H/8 (5 mm) crochet hook
Notions: tapestry needle
Pattern Notes
This pattern is worked in granny squares that are joined with panels worked on either side, then flat panels are worked for the front and sleeves. The garment is seamed using slip stitch. The hem, cuff and neckline are worked seamlessly in the round at the end, for a professional finish.

Pattern
GRANNY SQUARE (listed from top to bottom of finished garment)
SQUARE 1
With CC2, make a magic circle
Rnd 1: Ch 3 (counts as dc here and throughout), 2 dc in magic circle, *ch 3, 3 dc in magic circle; rep from * 2 more times, ch 3, sl st to 3rd ch of beg ch-3. Fasten off. (12)
Rnd 2: Join CC3 to ch-3 sp, ch 3, (2 dc, ch 3, 3 dc) in ch-3 sp, *(ch 1, 3 dc, ch 3, 3 dc) into next ch-3 sp; rep from * 2 more times, ch 1, sl st to 3rd ch of beg ch-3. Fasten off. (24)
Rnd 3: Join MC to ch-3 sp, ch 3, (2 dc, ch 3, 3 dc) in ch-3 sp, *ch 1, 3 dc into next ch-1 sp, (ch 1, 3 dc, ch 3, 3 dc) into next ch-3 sp; rep from * 2 more times, ch 1, 3 dc into next ch-1 sp, ch 1, sl st to 3rd ch of beg ch-3. Fasten off. (36)
Rnd 4: Join CC5 to ch-3 sp, ch 3, (2 dc, ch 3, 3 dc) in ch-3 sp, *(ch 1, 3 dc into next ch-1 sp) twice, (ch 1, 3 dc, ch 3, 3 dc) into next ch-3 sp; rep from * 2 more times, (ch 1, 3 dc into next ch-1 sp) twice, ch 1, sl st to 3rd ch of beg ch-3. Fasten off. (48)
SQUARE 2-6
Repeat instructions for Square 1 using the following combinations (starting from center)
Square 2: CC3, CC1, CC5, CC4.
Square 3: CC5, CC6, CC1, CC2.
Square 4: CC1, CC6, CC2, CC3.
Square 5: CC4, CC5, CC6, CC1.
Square 6: MC, CC3, CC1, CC4.
JOINING GRANNY SQUARES
Lay square 1 and 2 side by side, join CC6 to corner of square 1. Ch 2, dc in corner of square 2, *ch 2, dc in next ch-sp in square 1, dc in next ch-sp in square 2; rep from * 2 more times. Fasten off.
Rep to join all squares in a vertical column.
Row 1: With RS facing, join CC6 to bottom right ch-3 corner sp, (ch 3, dc) in same sp, [(ch 1, 3 dc) in each ch-sp across square, (ch 1, 3 dc) once in center of joining sts between squares] across all squares to topmost corner working only (ch 1, 2 dc) in top corner ch-sp. Fasten off. (33 3-dc clusters, 2 2-dc clusters)
Row 2: Join CC1 to first dc at bottom right corner of Row 1, ch 3, 2 dc in first ch-sp, (ch 1, 3 dc) in each ch-sp to top last ch-sp, 2 dc in last ch-sp, dc in last dc of Row 1. Fasten off. (35 3-dc clusters)
Row 3: Join CC2 to first dc at bottom right corner of Row 2, ch 3, dc in same st, (ch 1, 3 dc) in each ch-sp across, ch 1, 2 dc in last dc of Row 2. (same st count as Row 1)
Rep rows 1-3 for other side.
BACK
Row 1: Join MC to long edge of granny square strip, ch 3, dc in each dc and ch-sp across. Turn. (132)
Row 2-11 (12, 14, 17, 19, 21, 24, 26, 28): Ch 3, dc across starting in 2nd st from hook. Turn.
Fasten off. Rep for other side of granny square strip.
FRONT (make 2)
With MC, ch 134.
Row 1: Dc across starting in 4th ch from hook. Turn. (132)
Row 2-11 (12, 14, 17, 19, 21, 24, 26, 28): Ch 3, dc across starting in 2nd st from hook. Turn.
Fasten off.
SLEEVES (make 2)
With MC, ch 59 (62, 65, 68, 74, 77, 80, 86, 89)
Row 1: Dc across starting in 4th ch from hook. Turn. 57 (60, 63, 66, 72, 75, 78, 84, 87)
Row 2-29 (29, 30, 32, 33, 33, 34, 35, 35): Ch 3, dc across starting in 2nd st from hook. Turn. 57 (60, 63, 66, 72, 75, 78, 84, 87)
Fasten off.
FINISHING & ASSEMBLY
With WS together, lay front panels on back panel and use MC to slip stitch to seam along shoulder seam.
Match center of top of sleeve with shoulder seam, and use MC to slip stitch to seam sleeve to body.
Match cuff, underarm and hem, and use MC to slip stitch to seam side.

NECKLINE & HEM
Rnd 1: Join CC3 to a ch-sp in center back neckline, (ch 3, 2 dc) in same ch-sp as join, (ch 1, 3 dc) in each ch-sp along back neckline granny square section, then *ch 1, skip 3 sts, work 3 dc in next space between sts; rep from * down front panel to bottom front st on hem. Ch 1, (3 dc, ch 3, 3 dc) in corner st, then (ch 1, skip 1 st, work 3 dc in next space between rows) to other bottom front st on hem. Ch 1, (3 dc, ch 3, 3 dc) in corner st, then rep from * up front panel, (ch 1, 3 dc) in each ch-sp along back neckline granny square section, sl st to join. Fasten off.
Rnd 2: Join CC5 to rnd 1 in a ch-sp in center back neckline, (ch 3, 2 dc) in same ch-sp, *ch 1, 3 dc in ch-1 sp; rep from * to corner st, ch 1, (3 dc, ch 3, 3 dc) in each corner ch-sp, then rep from * to next corner st, ch 1, (3 dc, ch 3, 3 dc) in corner ch-sp, then rep from * to beg of rnd, sl st to join. Fasten off.

CUFF
Rnd 1: Join CC2 to a ch-sp in center back neckline, (ch 3, 2 dc) in same ch-sp as join, then *ch 1, skip 3 sts, work 3 dc in next space between sts; rep from * evenly around cuff, sl st to join. Fasten off.
Rnd 2: Join CC1 to rnd 1 in a ch-sp in cuff, (ch 3, 2 dc) in same ch-sp, *ch 1, 3 dc in ch-1 sp; rep from * to beg of rnd, sl st to join. Fasten off.
Rep for second sleeve.
Weave in all ends, block gently.
View this post on Instagram


