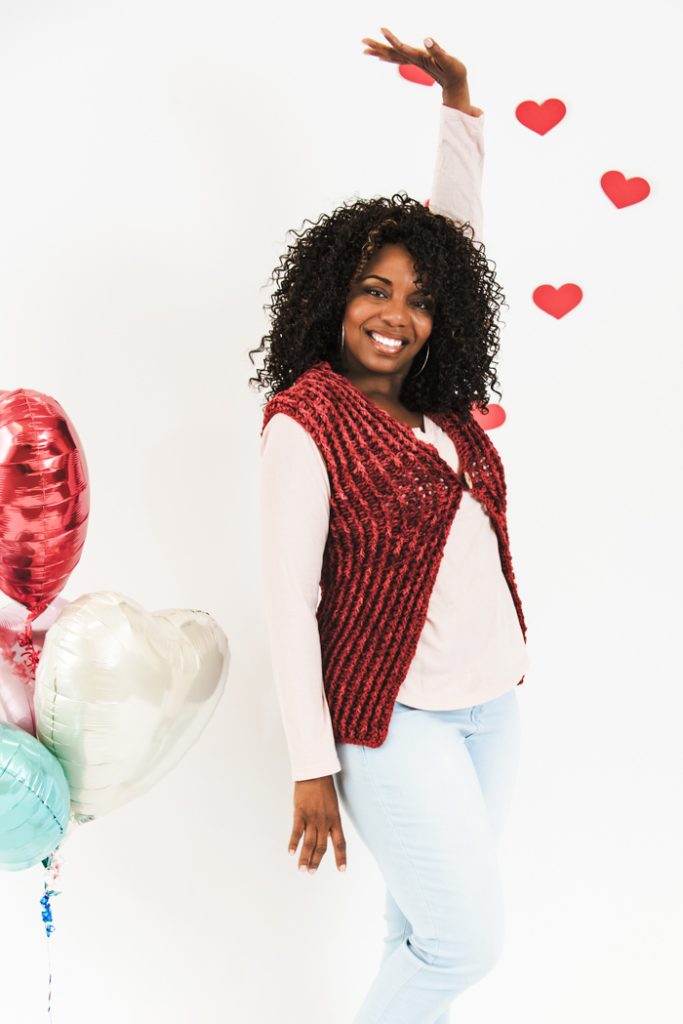
Create a charming wardrobe staple with the Roses Are Red Crochet Vest, a stylish and easy-to-make piece featuring a shawl collar, textured stitches, and a button closure. Designed to be worked in one seamless piece, this vest pairs beautifully with long or short sleeves, making it a versatile layering option for any season. Whether you’re dressing up for Valentine’s Day or just adding a cozy-yet-polished touch to your everyday outfit, this vest is both functional and fabulous.
Skill Level: Easy
Size: Finished bust size 36 (40, 44, 48, 52)” to fit bust size 34 (38, 42, 46, 50)”
2” of positive ease recommended
Shown in size 36
Gauge: 9 sts and 8 rows = 4” [10 cm] in stitch pattern
Materials
 Yarn: Malabrigo Yarn Twist (100% Baby Merino Wool; 150 yards [137 meters]/100 grams): #TW102 Sealing Wax (5 (6, 6, 7, 7) balls)
Hook: US size J/10 (6.0mm); US size P (11.5mm)
Notions: Yarn needle, one 1/8” button, sewing needle, matching thread
Special Stitches
Stitch Pattern
Row 1: Ch 3, *fpdc, bpdc; rep from * to last st, dc in t-ch, turn.
Rep Row 1 for patt.
Pattern Notes
Ch 3 at beginning of row counts as dc.
Pattern
Back
With larger hook, ch 82 (92, 201, 110, 120).
Row 1: Dc in 4th ch from hook and each ch across, turn. (80 (90, 100, 108, 118) sts)
Rows 2-32: Work even in Stitch Pattern.
Sizes 48 (52)” Only
Work even in Stitch Pattern 4 (8) more rows.
Divide for Front and Back
Right Front
Row 1: Work in established Stitch Pattern for 18 (20, 22, 24, 25) sts, leaving rem sts unworked, turn. (18 (20, 22, 24, 25) sts)
Row 2: Ch 3, dc2tog, work in established Stitch Pattern to end, turn. (17 (19, 21, 23, 24) sts)
Work even in Stitch Pattern for 12 (12, 14, 14, 16) rows.
Collar
Row 1: Work across 8 (8, 9, 11, 11) sts, leaving rem sts unworked, turn. (8 (8, 9, 11, 11) sts)
Work even in Stitch Pattern for 7 (7, 7, 9, 11) rows.
Fasten off.
Back
Row 1: Sk first 4 (4, 6, 6, 8) sts for armhole edge after Right Front, join yarn with larger hook, ch 3, dc in next 35 (41, 43, 47, 51) sts in established Stitch Pattern for Back, turn, leaving rem sts unworked. (36 (42, 44, 48, 52) sts)
Row 2: Ch 3, dc2tog, work in established Stitch Pattern to last 3 sts, dc2tog, dc in t-ch. (34 (40, 42, 46, 50) sts)
Work even in established Stitch Pattern for 11 (11, 13, 13, 15) rows.
Shoulder Shaping
Row 1: Ch 3, dc in next 7 (9, 10, 10, 11) sts, dc2tog. (9 (11, 12, 12, 13) sts)
Fasten off.
Join yarn at opposite edge of Back and rep Row 1 of Shoulder Shaping.
Left Front
Join yarn at Left Front edge and work same as Right Front.
Finishing
Sew shoulder seams.
Sew back seam of Collar and attach.
Edging
With smaller hook, join yarn at left front corner, ch 1, sc evenly around Left Front, Collar, Right Front, and bottom hem, working 3 sc in each corner, join with sl st to first sc. Fasten off.
With smaller hook, join yarn at bottom of Armhole, ch 1, sc evenly around Armhole, join with sl st to first sc. Fasten off.
Rep for second Armhole.
Sew button to Left Front. Slip button through Right Front to close.
Weave in all ends.


A drawing of the pattern pieces would be very helpful here. It is not clear whether you are starting at the bottom or going side to side. Are you starting in the middle of the back? There is so much ambiguity in this pattern.
Hello! I’ve reached out to the designer for advice and she or I will reply as soon as possible. Thanks! – Nicola, Editor
Hello Jean! This pattern is worked from the bottom up, which is why you divide for the front and back. It’s worked in one piece with as little seaming as possible. Hope that helps! – Nicola, Editor