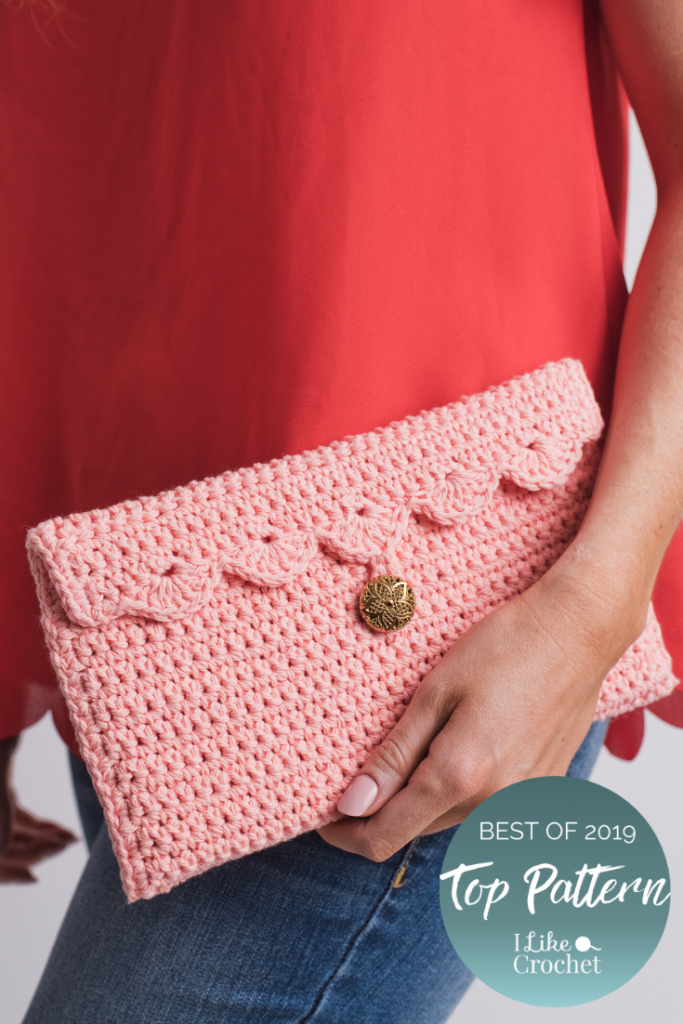
A row of pretty scallops accents the flap of this vintage styled clutch. A chain-stitch loop and vintage button provide the bag’s closure and add an elegant touch. Simple to stitch in a single panel of worsted-weight coral cotton yarn, this project is ideal for summer stitching and accessorizing.
Skill Level: Easy
Size: 10″ wide x 6″ high
Gauge: 14 sts and 17 rows = 4″ [10 cm] in sc
Materials
 Yarn: Lily Sugar‘n Cream (100% Cotton; 200 yards [184 meters]/113 grams): 18803 Coral Rose (1 ball)
Hook: US size G/6 (4.0 mm)
Notions: Tapestry needle, one 7/8″ shank button. For clutch insert (optional): Two 9″ x 10″ pieces National Nonwovens WoolFelt color #0942 Blushing Bride, one 8½” x 9½” piece Heat n Bond Ultrahold iron-on adhesive, 6-strand embroidery floss in color apricot (DMC #3341 or Sullivans # 45341), sewing needle.
Pattern Notes
Clutch is worked in one panel.
Beginning edge folds up to make front of clutch. Ending scalloped edge folds down to make clutch flap.
Ch 1 at beg of row counts as first sc.
Ch 3 at beg of row counts as first dc.
Pattern
Ch 36.
Row 1 (WS): Sc in 2nd ch from hook and in each ch across. (35 sc)
Row 2 (RS): Ch 1, sc in next st and in each st across, turn.
Rows 3- 46: Rep Row 2.
Row 47: Ch 3, dc in FL of next st and in FL of each st across, working last dc in top of tch, turn.
Rows 48-51: Rep Row 2.
Row 52: Ch 1, sc in next st, sl st in next st, *sk next 2 sc, 7 dc in next sc, sk next 2 sc, sl st in next st**; rep from * to ** once, sk next 2 sc, 4 dc in next sc, ch 10 (for button loop), sl st in first ch of ch-10, 3 dc in same sc to complete shell, sk next 2 sc, sl st in next sc; rep from * to ** twice, sc in next sc and in tch. Do not fasten off. (5 shells, 1 ch-10 button loop)
Border
Rotate work, 2 sc in side of last row just finished, *sc in side of each sc row, 2 sc in side of dc row; rep from * across first side of panel, working 2 sc in last st; rotate work, sl st in each sc across bottom edge of panel, rotate work; rep from * across second side of panel, working 2 sc in last st. Fasten off.
Finishing
Fold front of Clutch up so bottom (sl st) edge aligns with bottom edge of dc row.
Sew side seams together, working through both loops of sc border sts.
Sew button, centered, to clutch, 2¼” down from sl st edge.
Weave in ends.
Clutch Insert (Optional)
To make insert, follow manufacturer’s directions to adhere iron-on interfacing, centered, to one piece of felt. Test iron-on felt first.
Peel off paper backing and adhere fused felt piece to remaining felt piece, aligning felt edges. With doubled strand of apricot embroidery floss and sewing needle, sew a line of running stitch along edges of felt insert, stitching approximately 1/8″ from edge.
Fold completed insert in half width-wise and place in Clutch.


WOW they are beautiful probably will make them all.
I have been looking fir this design for uears now , Thanks????
Very pretty clutch. I love the border design.