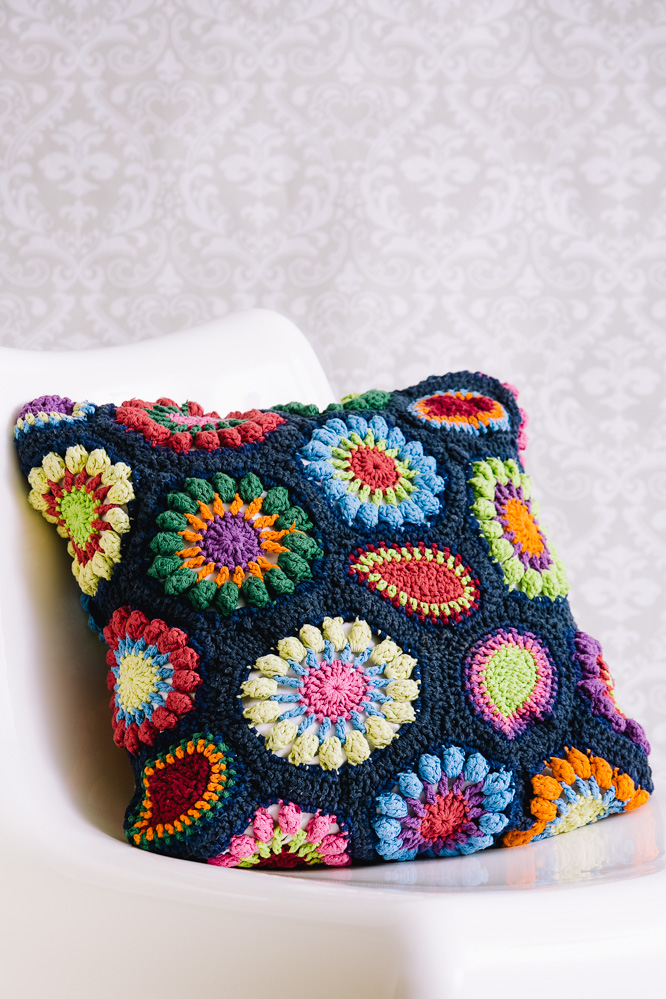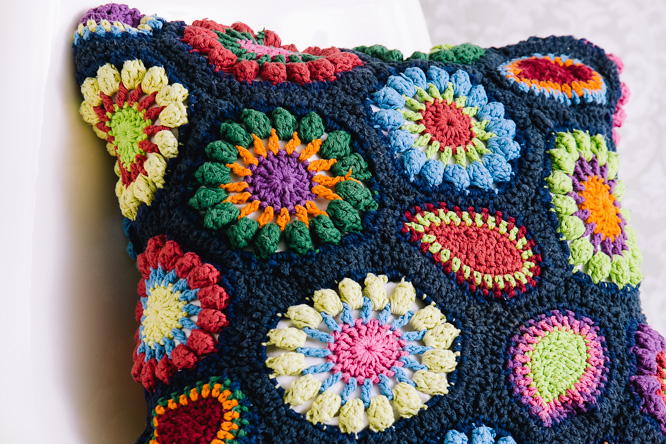
Spice up that drab sofa in no time with the brightly-colored Retro Flower Cushion. It uses only two motifs, each made in two sizes. The main leaf motif uses the five basic crochet stitches, so it’s ideal for a group or teaching project or for a crochet novice.
Skill Level: Intermediate
Size: Finished cushion cover: 50 cm x 50 cm; Flower Motif diameter: (large) 16 cm, (small) 15 cm;
Leaf Motif length: (large) 15cm, (small) 14cm
Gauge: 17 sts and 18 rows sc = 4”(10cm) in sc using 5.0 mm hook
Materials
Yarn: Peaches & Creme (100% cotton; 120 yards [109 meters]/71 grams): #01612 Sunshine (A, 1 ball), #01740 Bright Pink (B, 1 ball), #01725 Blueberry (C, 1 ball), #01430 Burgundy (D, 1 ball), #01628 Bright Orange (E, 1 ball), #01530 Rouge Red (F, 1 ball), #01237 Forest Green (G, 1 ball), #01114 Indigo (H, 3 balls); Lily Sugar’n Cream (100% cotton; 120 yards [109 meters]/71 grams): #01318 Blackcurrant (I, 3 balls), #01712 Hot Green (J, 3 balls)
Hook: US size H/8 (5.0 mm) and US size I/9 (5.5 mm) hooks
Notions: 5 x 20 mm buttons, safety pins (for attaching motifs together before joining)
Special Stitches
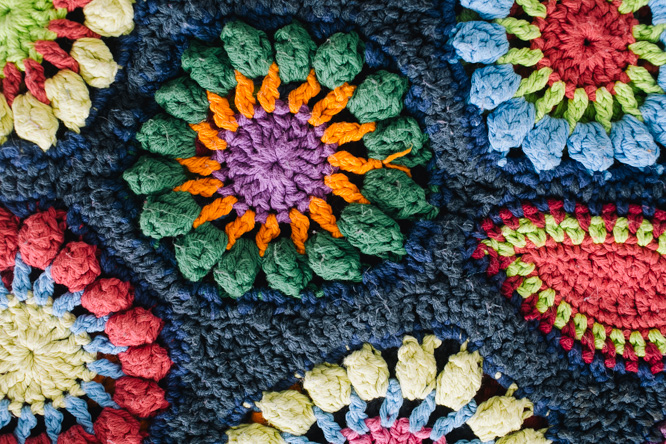
Popcorn: Worked into a chain space as follows: Make 3 ch, then 3 dc. Pull up working loop and remove hook. Insert hook from front of work to the top of the first 3ch. Pick up working loop from behind the 3 dc, yo and pull it through everything on the hook. Popcorn made.
Popcorn Flower Motif: Starting from the center, this flower is worked in the round, using a different color for each part of the flower. Then, using background color, a round of single crochet worked around the edge, followed by a round of double crochet. Leave long ends for darning in later.

Pattern
Popcorn Flower Motif
Using center color, ch 7. Join into a round with a sl st.
Rnd 1: Ch 3 (counts as dc), 15 dc into ring, join to top of 3 ch with a sl st. (16 dc)
Rnd 2: With 2nd color, ch 4 (counts as 1 dc and ch 1), *dc in next st, ch 1; repeat from * to end.
Join to 3rd st of 4 ch with a sl st. (16 dc, 16 ch sp)
Rnd 3: With 3rd color, into a sp work a popcorn (see stitch notes, above), ch 2, work another popcorn into next ch sp. Continue in this way until 16 popcorns each joined by 2ch have been completed. (48 ch)
Rnd 4: With background colour, *2 sc into ch sp, ch 1, 1 sc into top of popcorn, ch 1. Repeat all around. (80 ch)
Rnd 5: Still using background colour, 1 hdc into each st, join with a sl st. (80 ch)
Make the following popcorn flowers (the letters refer to the colour used, from the center, out) using a 5.0 mm (H) hook: [F,C,E,H], [G,F,J,H], [F,J,G,H], [F,J,C,H], [J,F,I,H], [F,I,C,H], [J,F,A,H], [C,I,B,H]
Make the following using a 5.5 (I) mm hook: [A,C,E,H], [B,C,A,H],[I,E,G,H], [A,C,F,H], [E,I,J,H], [B,G,F.H], [F,J,B,H], [B,J,C,H], [I,E,D,H], [C,A,G,H]
Leaf Motif
Beginning with a row of foundation chain, the leaf is made in the round. The central colored section is made up of 2 rounds using the same color, the next two rounds use different colors. Two rounds of background color complete the leaf.
Ch 11, loosely.
Rnd 1: Into 2st ch from hook, sl st. Into next ch, 1 sc. Into next 6 ch, work as follows: 1 hdc, 3 dc, 1 hdc, 1 sc. Work a sl st into each of next two ch. Make a sc into the end ch, turn, and down the other side of the foundation ch, into the next 10 ch, work as follows to match the other side: 2 sl st, 1 sc, 1 hdc, 3 dc, 1 hdc, 1 sc, 1 slst. (22 sts)
Rnd 2: Make 3 sc into end ch, turn and work 1 sc into each st to end, 3 sc into end ch, turn, 1 sc into each ch to end. Join to first sc with st st. (26 sts)
Rnd 3: Join in 2nd color at one end, ch 2 (counts as 1 sc, ch 1). *1 sc, ch 1 to end. Join to top of 2 ch with a sc. (52 sts)
Rnd 4: Join in 3rd color at one end, ch 2, into same st, make 1 hdc. *ch 1, 1 hdc into ch sp, repeat from * to end of leaf, work an extra hdc into end st, then continue from * to end. Join to initial ch with a sl st. (56 sts)
Rnd 5: With background color, starting at one end, 2 sc into next ch sp. [ch 1, 1 sc into next ch sp] 12 times. Ch 1, 2 sc into ch sp, ch 1, 2 sc into next ch sp. [Ch 1, 1 sc into next ch sp] 12 times. 2 sc into next ch sp, ch 1. Join to top of 2 ch with a sl st. (60 sts)
Rnd 6: Ch 2 (counts as 1st hdc), then 1 hdc into each st all around. Join to top of ch 2 with a sl st. (60 sts)
Make the following leaf motifs using a 5.0 mm (H) hook(the letters refer to colours, from the inside out): [A,G,E,H], [F,C,J,H], [C,A,F,H], [F,J,D,H], [D,E,G,H], [D,E,C,H]
And with a 5.5 mm (I) hook: [J,B,D,H], [B,A,I,H], [E,F,A,H], [B,C,J,H]

Button Band
Make a foundation of 70 chain, fairly loosely.
Rows 1-5: Sc to end.
Buttonhole Band
Rows 1-2: Sc to end.
Row 3 (Buttonhole row): 6 sc, 2 ch, sk 2. [12 sc, 2 ch, sk 2] 4 times. (6 sc)
Row 4: 6 sc, [2 sc into 2 ch sp, 12 sc.] 4 times. 2 sc into 2 ch sp, 6 sc.
Row 5: Sc to end.
Joining Motifs
Sew the buttons onto the button band to correspond with the buttonholes, and join the short ends together. Pin onto the cushion pad, just above the half way point.
Using the diagram, pin the motifs together around the cushion pad.
Where edges meet, join the motifs, right sides together, with single crochet going through the edges of each piece. This leaves triangular shaped gaps which can be filled using method outlined below.
Triangular Gap Filler
With wrong side of the work facing, at narrowest corner of triangular gap, join in yarn and work a sl st, taking in edge sts from each piece. Make an sc in one edge, and join to opposite edge. Make an hdc and join to opposite edge. Continue in this way, using sts of increasing height, until gap is closed to your satisfaction. If you do a treble and the gap still needs filling, work a series of scs across the treble to the other edge.
Finishing
Weave in all ends securely. Because of textural nature of the cushion there is no need to iron it.


Hi! I meant the short ends of the button and buttonhole band- they go one on top of the other,you sew the short ends together where they overlap.I think you need an 18″ square cushion pad for this design,that’s what I’m referring to.I’m sure I sent a diagram with the pattern but its so long ago now,I dont still have it.I’ll try and sketch one for you.Its a fairly freeform design, I encourage you to experiment with the arrangement of the motifs, each one will be as bit different and thats OK.
…also it says “Sew the buttons onto the button band to correspond with the buttonholes, and join the short ends together. Pin onto the cushion pad, just above the half way point.” Not sure what is meant by “join the short ends together…and what cushion pad?
Hello Kristen! I’ve reached out to the designer for advice and she or I will reply as soon as possible. Thanks! – Nicola, Editor
The joining direction state “Using the diagram, pin the motifs together around the cushion pad.” There is no diagram given and no link for one on this page. Please post the diagram. As it stands now, there is no real way to know how to assemble it.
Hello! We’ve created a diagram that will hopefully be helpful: https://www.ilikecrochet.com/wp-content/uploads/Retro-Flower-Cushion-Schematic.png
Thanks! – Nicola, Editor
Under the Joining Motifs heading, it reads “using the diagram…” I do not see a link or attachment to a diagram. Is there a diagram? Thank you.
Hi Albena! You can view our free articles here: https://www.ilikecrochet.com/category/daily/
-Nicola, Editor
Hello! We’ve created a diagram that will hopefully be helpful: https://www.ilikecrochet.com/wp-content/uploads/Retro-Flower-Cushion-Schematic.png
Thanks! – Nicola, Editor
Where is the diagram please?
Hello! We’ve created a diagram that will hopefully be helpful: https://www.ilikecrochet.com/wp-content/uploads/Retro-Flower-Cushion-Schematic.png
Thanks! – Nicola, Editor
Where is the diagram for joining motifs? It was mentioned in Joining Motifs.
Hello! We’ve created a diagram that will hopefully be helpful: https://www.ilikecrochet.com/wp-content/uploads/Retro-Flower-Cushion-Schematic.png
Thanks! – Nicola, Editor