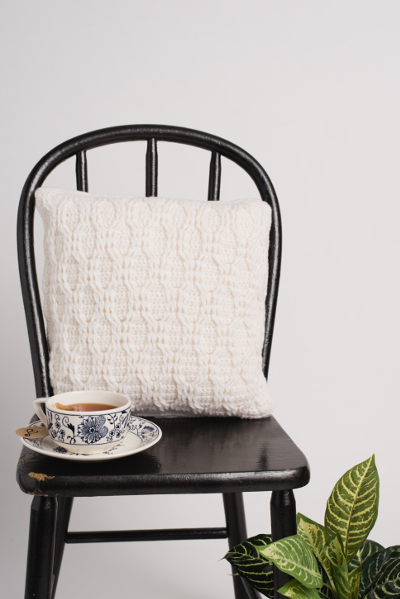
Unique cables grace the front and back of this throw pillow for a trendy yet classic addition to your home. Worked in two pieces and joined at the end, this intermediate pattern is a great way to get used to working with front post double crochet.

Skill Level: Intermediate
Size: 12” square
Gauge: 17 sc = 4″ in pattern stitch after wet blocking
Materials
 Yarn: Knit Picks Wool of the Andes Sport (100% Wool; 137 yards [125 meters]/50 grams): 25269 White (4 balls)
Hook: US size F/5 (3.75 mm)
Notions: Tapestry needle, 12″ pillow insert
Special Stitches
Fpdc (front post double crochet): Work dc inserting hook from front to back around the post of the hdc 2 rows below.
Crdc (Cross right double crochet): Wrap yarn around hook, insert hook into the dc on the right-hand side in row below, (wrap yarn around hook, pull yarn through 2 lps on hook) twice.
Cldc (Cross left double crochet): Wrap yarn around hook, insert hook into the dc on the left-hand side in row below, (wrap yarn around hook, pull yarn through 2 lps on hook) twice.
Pattern Notes
This pattern is worked in two identical separate pieces.
They are joined later to create the pillow shape.
Pattern
Front and Back
Ch 62.
Row 1: Hdc in 3rd ch from hook, hdc in every ch across, turn. (60 hdc includes the first ch 2)
Row 2: Ch 2 (count as hdc), hdc in each hdc across, turn.
Rows 3, 5, 7, 9, 11, 13, and 15: Ch 1, sc in every st across, turn. (60 sc)
Row 4: Ch 2 (count as hdc), hdc in next sc, (fpdc around the corresponding hdc on Row 2) twice, skip next 2 sc behind fpdc just made, hdc in each of the next 4 sc, [(fpdc around the corresponding hdc on Row 2) 4 times, skip next 4 sc behind the fpdc just made, hdc in each of the next 4 sc] 6 times, (fpdc around corresponding hdc on Row 2) twice, skip next 2 sc behind the 2 fpdc just made, hdc in next sc, hdc in 2nd ch, turn.
Row 6: Ch 2 (count as hdc), hdc in each of next 3 sc, (crdc in each of first and 2nd available fpdc of row below, cldc in each of 3rd and 4th available fpdc on row below, skip next 4 sc behind the crdc and cldc just made, hdc in next 4 sc) 7 times, ending with hdc in last 4 sc, turn.
Rows 8: Ch 2 (count as hdc), hdc in each of next 3 sc, (fpdc in each of the next 2 crdc and 2 cldc on row below, skip next 4 sc, hdc in next 4 sc) 7 times, turn.
Row 10: Ch 2 (count as hdc), hdc in each of next 3 sc, (fpdc in each of the next 4 fpdc, hdc in each of next 4 sc) 7 times, turn.
Row 12: Ch 2 (count as hdc), hdc in next sc, (cldc in each of first and 2nd available fpdc, skip next 2 sc behind the cldc just made, hdc in next 4 sc, crdc in each of next 2 fpdc on row below, skip next 2 sc behind 2 crdc just made) 7 times, hdc in last 2 sc, turn.
Row 14: Ch 2 (count as hdc), hdc in next sc, fpdc in each of next 2 cldc on row below, skip next 2 sc behind the fpdc just made, (hdc in each of the next 4 sc, fpdc in each of next 2 crdc and cldc on row below, skip next 4 sc behind 4 fpdc just made) 6 times, hdc in each of the next 4 sc, fpdc in each of next 2 crdc on row below, skip next 2 sc behind 2 fpdc just made, hdc in last 2 sc, turn.
Row 16: Ch 2 (count as hdc), hdc in next sc, fpdc in each of next 2 fpdc on row below, skip next 2 sc behind the fpdc just made, (hdc in each of the next 4 sc, fpdc in each of next 4 fpdc on row below, skip next 4 sc behind 4 fpdc just made) 6 times, hdc in each of the next 4 sc, fpdc in each of next 2 fpdc on row below, skip next 2 sc behind 2 fpdc just made, hdc in last 2 sc, turn.
Rows 17-58: Rep Rows 3-16.
Row 59: Ch 2, hdc in every st across. Fasten off.
Finishing
Weave in all ends.
Block each piece to size.
Assembly
Rnd 1: Hold with WS of both pieces together, insert hook into the edge stitch of both pieces and work sc around on 3 sides. Insert the pillow form into the created pouch. Work sc across the last side.
Rnd 2: Work reverse sc in every sc of previous rnd.
Fasten off. Weave in the ends.


I would like it for 24 inch pillow. I also would like to add a zipper.
Hi there, this tutorial should help:
https://www.ilikecrochet.com/daily/crochet-techniques/finishing-techniques/zippers-101-sewing-zippers-onto-crochet/
In terms of making the pillow larger, you will have to measure to see what your starting chain should be. Hope this helps! – Nicola, Editor
How can we turn this into a 20×20? I absolutely love the design!!
You should figure out how many stitches you need to make it 20 X 20. Add chains to the number necessary to get the desired size.