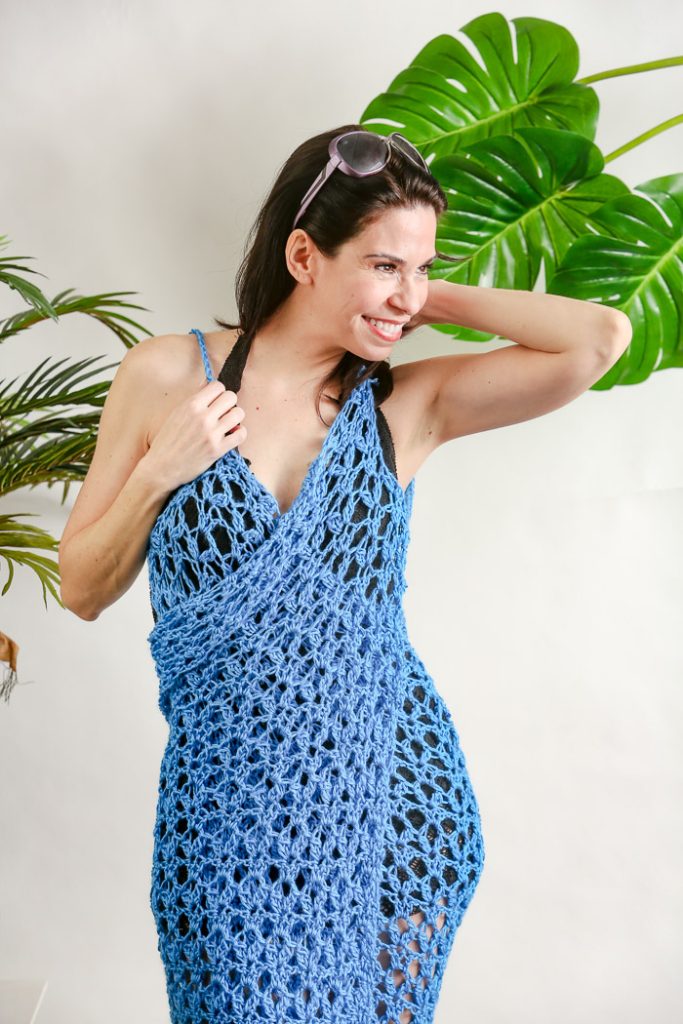
You may have seen fabric versions of this cover-up in stores and now you can crochet your very own! This simple wrap is lightweight which makes it perfect for warm summer days.
Skill Level: Easy
Size: 29” wide and 46” long
Gauge: 11 sts and 5 rows = 4” square in dc
Materials
 Yarn: Caron Simply Soft (100% Acrylic; 315 yards [288 meters]/170 grams): #9784 Cobalt Blue (2 skeins)
Hook: US size N (9.0 mm)
Notions: Tapestry needle, stitch markers (2)
Pattern Notes
The wrap is worked from the bottom up. The straps are added last to finish.
Special Stitches
Cluster Stitch (CL)
*Yo, insert hook in st, yo, pull up loop; rep from * twice more, yo, pull through all loops on hook.
Pattern
Ch 127 (increase/decrease by 4 ch as needed)
Row 1: Dc in 4th ch from hook, dc in next 2 ch, *ch 1, sk next ch, dc in next 3 ch; rep from * to end of row, dc in last st.
Row 2: Turn, ch 3 (counts as first dc here and throughout), sk 1, (CL, ch 3, CL) in next st; rep from * in center st of each dc group across, ending with dc in last st.
Row 3: Turn, ch 3, (work 3 dc, ch 1) in each ch-3 sp across row, ending with dc in last st.
Rows 4-28: Repeat Rows 2-3, ending on Row 2. Fasten off.
Mark the 4th CL in from each side with stitch marker
Row 29: Turn, join yarn on the 4th CL, rept Row 3, using stitch marker as last st.
Rows 30-32: Repeat Rows 2-3, ending with Row 2. Fasten off.
Strap (Make 2)
Ch 36.
Row 1: Working in the back bar of each ch, sc in the second ch from hook and in each across. Fasten off, leaving long tail.
Finishing
With tapestry needle, sew Strap onto Row 32 edge and Row 28 edge.
Weave in all ends.
View this post on Instagram


I just finished this project and it was pretty quick and easy! The beginning was a little tricky because it wasn’t clear where to start the clusters, but they start in the center DC of the 3DC repeat of the previous row. But once it gets going, the two row repeat is easy and I finished it in just a few days. I also opted for a cotton yarn, rather than acrylic. I’m afraid that I don’t have any advice for adjusting size except to just count out, or decrease stitches, but I do wish that sizes/modifications would have been included as this is certainly not a “one size fits all”, and the designer should have included how to adjust for size. I was hoping to post a finished pic…. but there doesn’t seem to be an option for the here in the comments. If anyone is on Ravelry, I looked up this pattern and posted my pics as a finished project, if anyone would like to see how it looks when it’s finished! My Ravelry name is HearthandMagic ❤️
Thanks for the tip! ????
It would be helpful to see a diagram of the project anda short explanation of the general strategy. It looks to me like this is worked sideways. What about adjustments for bigger bodies? Do you work more rows? The photo does not look like a single strand of Simply Soft using Size N hook.
Hello! I’ve reached out to the designer for advice and she or I will reply as soon as possible. Thanks! – Nicola, Editor
I agree, a diagram is needed to show construction. Full photo and back and side views also.
Hi Maggie! Additional photos have been added! Hope this helps! – Nicola, Editor
Your photos are inadequate for seeing the ENTIRE project. I’ve noticed this throughout all of the issues. Why?